A complete PDF version of this post is available here
The Buffer Wizard is a ‘hidden’ add-on to ArcGIS. It allows for additional control when creating buffers. Specifically, it makes creating ‘inside’ buffers easier than the standard buffer tool.
The wizard was removed from the standard ArcMap user interface after ArcGIS 8.3, but is still available if you customize the user interface. I covered adding the buffer wizard in an earlier post (https://www.gis.mtu.edu/?p=448), but a quick summary of the steps is to open the Customize menu and choose Customize mode… Select the Commands tab, then enter the text ‘buffer wizard’ in the ‘Show commands containing’ box. Drag the tool to a toolbar (the Tools toolbar is suggested).
One possible application for this tool would be in preparation to perform sampling. You might want to assess the understory vegetation in a plot of land, but don’t want any of your sampling point to be within 10 meters of the edges of the plot.
1. Click the Buffer Wizard icon to start the tool ![]()
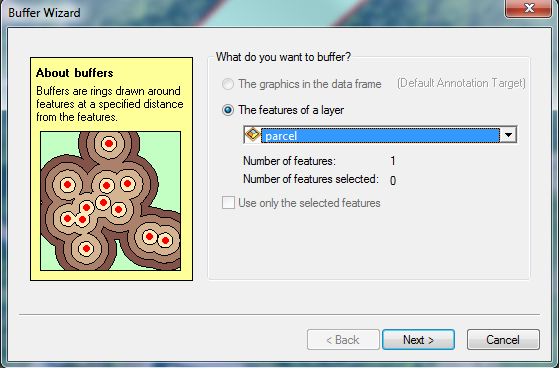
2. Choose the polygon layer that represents the area you want to sample from the drop-down list and click Next>.
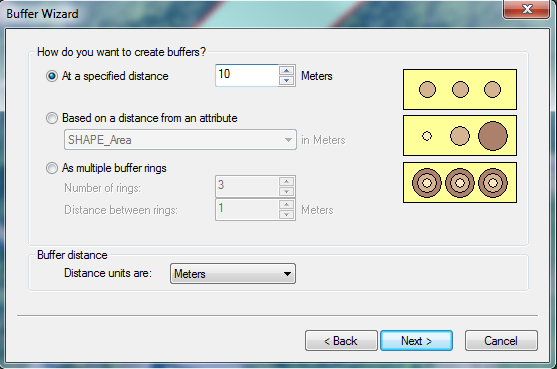
3. Specify your buffer distance (10) and verify the units are correct (meters). Note that you could choose to buffer based on an attribute table value or create multiple ring buffers here. Click Next>.
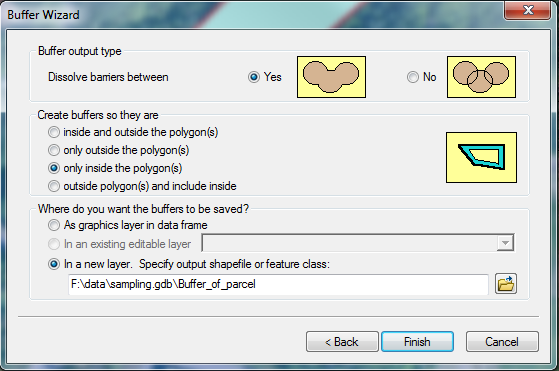
4. In the next window, select “only inside the polygons” and choose an output filename. This can be either a shapefile or a feature class in a geodatabase. Finish>.
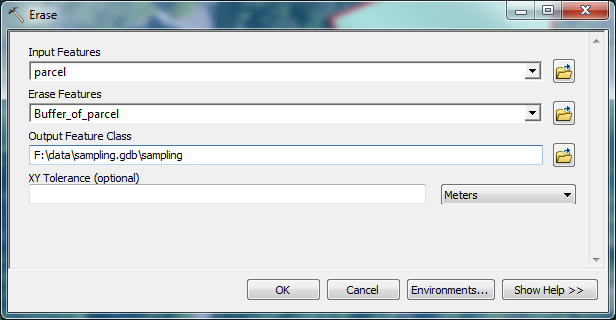
To remove areas within 10 meters of the boundary of your parcel, you will need to perform one additional step with the Erase tool. You can either use the Search tool (Windows > Search or Cmd-F) or expand ArcToolbox > Analysis Tools > Overlay > Erase. Your Input Features should be your Parcel layer, and the Erase Features your inside buffer. Choose an output file and click OK.
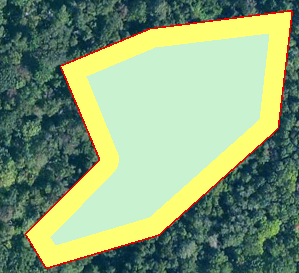
Here is how the original parcel appears, followed by the inside buffer and resulting polygon with the 10-meter border erased:
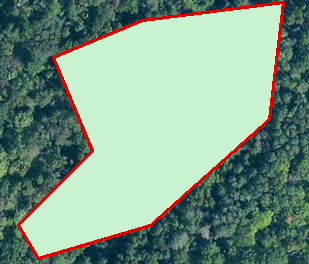
Original parcel (green with red border)
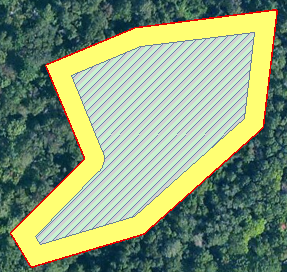
Final sampling area (crosshatched area)
Now if you generate random sampling points using ArcToolbox > Data Management Tools > Feature Class > Create Random Points, you can use the final sampling area as a constraining feature class and ensure none of your points will be within 10 meters of the parcel boundary.
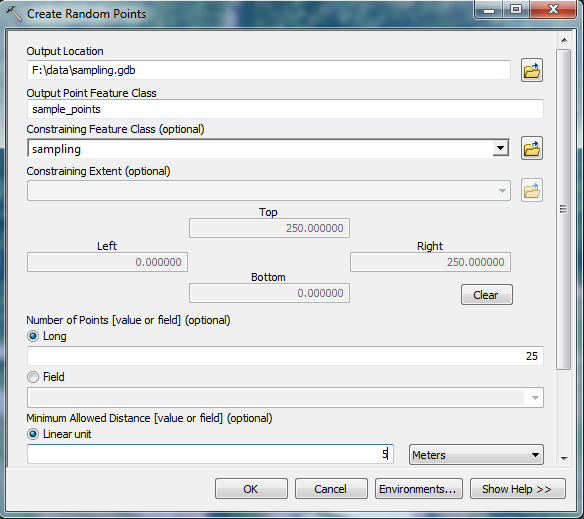
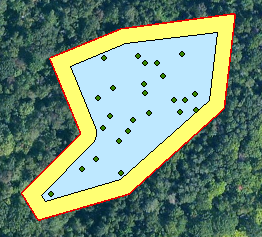
The resulting points are shown here: 
Note that none fall within the 10-meter buffer.
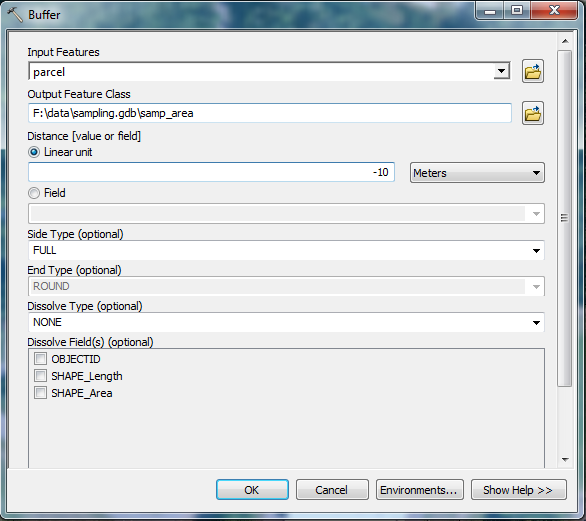
There is nearly always more than one way to accomplish a task in GIS. This workflow was written to illustrate the creation of an inside buffer using the Buffer Wizard, and a possible application with an inside buffer. The standard ArcGIS Buffer tool (ArcToolbox > Analysis Tools > Proximity > Buffer) lets you enter negative buffer distance values.
The resulting polygon has the same geometry as the original, just shrunk by the negative buffer amount (in the example above, 10 meters). It creates the same final polygon as the buffer inside then erase workflow above (buffer shown in blue below) with just a single step… You may have other needs for an inside buffer, though, so the Buffer Wizard can be quite useful.
