A Twitter conversation this week reminded me that it’s not always easy to cite data or maps you may use in your reports, papers, or theses. As a result, I revisited and updated a web resource I put together 10 or more years ago that lists sample citations for GIS maps and data, and points to other web resources with formatting guides: Citing Geospatial Data Remember, you will need to choose a citation format acceptable to your instructor, advisor, or journal editor.
Tag Archives: tips
Troubleshooting slow performance in ArcGIS
ESRI‘s Support Services recently posted a document that outlines things to check if you are experiencing performance (speed) issues with ArcGIS. It has some ideas that are good practice for general troubleshooting, as well as several suggestions specific to ArcGIS. Check it out.
Top 10 resources for new GIS users
ArcMap interface tip
![]()
If you are ever inexplicably missing the buttons to switch between Data View and Layout View in ArcMap (shown above), open the View menu and ensure “Scroll Bars” is checked. These buttons are not available when the scroll bars are turned off.
Tutorial – generating regularly-spaced sampling points in polygons
A tutorial on how to use the generate fishnet (and the clip and buffer) tool to generate a grid of regularly-spaced points in ArcGIS 10 is now available.
Please email any questions or comments. Look for a future posting on a ModelBuilder tool to accomplish the same in a more automated fashion.
Manual for working with ArcGIS 10
A manual for learning to use ArcGIS 10, produced by Amy Hillier at the University of Pennsylvania, is available here. This 80+-page document covers many of the options new users should be familiar with, and includes tips on making maps, georeferencing, spatial joins, creating spatial data, and troubleshooting.
Using MapTips in ArcGIS
It is often useful in a map to enable “MapTips” for layers in an ArcMap document. When map tips are on, hovering the cursor over a feature on the map will display the contents of a field from the attribute table in a pop-up window. This eliminates the user’s need to use the Identify tool on a layer.
To turn on map tips, open properties for the layer and choose the Display tab. In the Display Expression box, select the field you would like shown in the pop-up and check “Show map tips using the display expression“.
However, you may find this option unavailable (“grayed out”) when trying to enable map tips.
This is usually caused by the layer not having a spatial index available (see this post from ESRI for more information). The solution is to build a spatial index. This may be accomplished two ways:
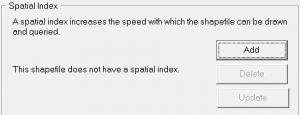
1) in ArcCatalog, navigate to the layer, select it, and open Properties. Choose the Indexes tab and click Add under Spatial Index. 
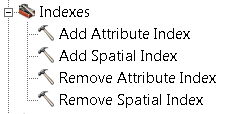
2) use the Add Spatial Index tool. In Arc Toolbox expand Data Management Tools > Indexes and open the Add Spatial Index tool. Select your layer as the Input Features in the tool and click OK.
An advantage to using the ArcToolbox tool is it may be used to rebuild an existing spatial index. ArcCatalog may only be used to create an index if one does not already exist.
After creating a spatial index, the Show MapTips option should be available for your layer.
ArcGIS tips document
ESRI has created a nine page ArcGIS Desktop Tips and Shortcuts document. It lists keyboard and mouse shortcuts for many common operations, and identifies which work for versions 9 and 10 of ArcGIS (ArcMap and ArcCatalog). A shorter list is available in the ArcGIS 10 application help files. Tap F1 when ArcMap is running and search for keyboard shortcuts.
You can also use the Help files for ArcGIS 10 in the ArcGIS Resource Center. Search for keyboard shortcuts. Help for other versions of ArcMap (or other ESRI applications) can be found by going to the ArcGIS Resource Center and clicking Help. Expand the list for the application you are interested in (click the +) for help files from the older versions.
Tip: the help files from the Resource Center are the most up-to-date for all ESRI software. Sometimes updated documentation is not included with service packs and patches, but these files are kept current.
Georeferencing scanned images in ArcGIS
Georeferencing is the process of assigning a coordinate system to a scanned image (map, aerial photo) in GIS. A georeferenced image does not have all scale (vertical scale) distortion removed, so if you georeference an air photo with a large amount of vertical relief across the scene, the scale of the image and the accuracy of the alignment will vary across the scene. For scanned maps, the fit should be better, as nearly all maps are planimetric (designed with scale distortions removed).
To georeference a hardcopy map or photo, you will need both a high-quality scan of the original, plus a reference layer. The reference layer can be in any coordinate system, but you should have five points that you can see on both the scanned image and the reference layer. These should be features that are unlikely to move over time, such as road intersections, bedrock outcrops, or street corners.
Once georeferencing has been applied to your scan, you may use it in conjunction with other layers either as a backdrop for a map or as a source from which you can create new features. The quality of the original map or photo, the resolution of the scan, and your ability to locate high-quality control points will all affect how well the georeferenced image will fit with other features in your GIS.
Here is a document that describes the georeferencing process in ArcGIS. The instructions should work for both ArcGIS 9.x and 10.x.
Store relative pathnames for layers in ArcGIS
By default in ArcGIS 10, full pathnames are stored for all layers you add to a map. This means if you have a file located at c:\data\hydro\rivers.shp that’s used in a map, the full pathname (c:\data\hydro\rivers.shp) to the layer is stored in the map document. ArcMap will always look in c:\data\hydro for the file rivers.shp. Using relative pathnames allows you to move map documents and layers around, as long as the relative locations of the map document and the data don’t change, e.g., as long as the map.mxd map document and the folder data (containing a subfolder hydro with the file rivers.shp, shown below) are moved together, ArcMap will still be able to open the map without issues.
To make the change to relative paths for a single map, choose Map Document Properties… from the File menu and check Store relative pathnames to data sources.
![]()
If you want all your new maps to be stored with relative paths you will need to specify relative paths as the default. To do so, click Customize > ArcMap Options… to open the ArcMap Options dialog box, and then click the General tab. Check the option to Make relative paths the default for new map documents. This setting is stored in the registry.
Why should you care about these settings? If you move map documents and data around, say on a flash drive or portable hard drive, these devices can be assigned different drive letters (e, f, g, i…) depending on what computer they are plugged into. If the drive letter changes between sessions and you are using full path names, ArcMap will be unable to find some, or all, layers in your map, and you will be presented with an exclamation point next to the ‘missing’ layers:
Speaking from personal experience, it is a pain to have to re-connect more than a few missing layers, and some maps have dozens. What’s the process to fix a missing layer?
- Open the layer’s properties, either by double-clicking on the layer name or right-clicking on the layer and choosing Properties…
- Click the Source tab and then the Set Data Source… button, browse to the layer’s location on your computer, select it, click add, then OK.
- Repeat for each missing layer.
To avoid having to repair any map documents in this fashion, you should either a) never move your map documents and associated files around, or b) use relative pathnames, and store your map documents and data in the same directory (or subdirectories).


